Sunday, December 30, 2012

Gyoza: Japanese Dumplings!


Do you recognize these little dumplings from a visit to your local Japanese or Chinese restaurant?  Chinese restaurants call these yummy, pan-fried bites potstickers.  There really isn't any difference that I can tell; they are delicious regardless of what they are called!  Still, since my heritage is Japanese, we'll go with that for now!:)
My grandparents immigrated to the USA, so my parents were born and grew up in Colorado.  My mom made all types of dishes; she loved to cook also!  We had Japanese recipes fairly often, but that was always the menu for the New Year, no matter what!  Our "Japanese New Year" was pretty international though-- sushi and sashimi shared the table with my aunt's macaroni salad, ham, and one year-- a lasagne!  I guess it was actually very American!
Anyway, these little dumplings are so fun to make and even more fun to eat!  They are rather labor intensive since you have to form each one, but it can be a family project, or you can put on a movie, relax, AND feel very productive!  If you line the dumplings up on parchment paper and freeze them on a tray, you can store them in a plastic bag in the freezer.  Then you can have these little treats whenever you want!  
Gyoza can be filled with just about anything, but this recipe is probably the most common.  A lot of gyoza use Napa cabbage in them, but I had some beautiful spinach from the Farmer's Market, so I used that.  (Can you believe Texas?  December and January are the months for spinach!  I still can't get used to it!)  You can also use frozen spinach.
Well, I hope you try these tasty little bites!  They might add something different to munch on during the football games!  Happy New Year!
JAPANESE GYOZA (MAKES ABOUT 50, WHICH IS ONE PACKAGE OF GYOZA WRAPPERS)
1 lb. ground pork
10 oz. fresh spinach (not the baby spinach), or 1/2 pkg. frozen spinach, thawed and      squeezed dry
1 Tbl. salt (if using the fresh spinach)
3 Tbl. minced fresh ginger
2 scallions, sliced with green tops
4 tsp. soy sauce
4 tsp. rice wine (mirin) or rice wine vinegar
1 tsp. sugar
2 Tbl. sesame oil
1 pkg. gyoza or potsticker wrappers (Don't use wonton wrappers, they are too thin. Find these frozen at the grocery store-- they thaw fairly quickly at room temperature.)
Vegetable oil

If using fresh spinach:  Make sure your spinach is clean by rinsing in several changes of water.  Chop it up and put it in a large bowl.  Sprinkle it with the salt and toss.  Allow to set for 30 minutes.  Rinse the spinach in a colander and squeeze out all the water.
Put the spinach and all the other ingredients except the wrappers and vegetable oil in a large bowl.  Mix altogether very well.  Get out a sheet pan and line it with parchment paper.  Fill a small bowl with water.
To form the gyoza:  Hold one wrapper in your palm and put about 2 tsp. filling in the middle.  Dip your finger in the small bowl of water and wet the inside edge of the wrapper.  Fold it in half and pinch the top together.  Now make three pleats from the middle out with the edge facing you (the other side stays flat) and press them firmly to seal the dumpling.  Now do the same from the middle out to the other side of the dumpling.  Make sure they are sealed well.  One side of the dumpling has pleats and the other is smooth.  Put the dumpling on the paper pleats side up and press down slightly so the bottom rests flat.  If you don't want to do this, just seal the dumpling edges flat, but still make sure to put them on the sheet pan sealed side up and flat on the bottom.

Now, to cook them!
Heat 2 Tbl. vegetable oil in a large skillet that has a cover.  Use medium-high heat.  Put the gyoza into the pan flat side down (pleat side up) and allow to brown on the bottom.  This takes about 2-3 minutes, but watch them carefully so they don't burn.  Add 1/2 cup water to the skillet, cover, and continue to cook on low, simmering 5-6 minutes (longer if frozen).  Uncover and cook for 2-3 minutes longer until all the water has evaporated.  
Serve with a dip of soy sauce and rice wine vinegar to taste.  You can add chile sauce to that if you like things spicy!
Yum!
ASB  


Wednesday, December 26, 2012

French Christmas


Yay!  Hope you all had a wonderful Christmas yesterday!  We had so much fun with my daughter, Marie, and her new husband (since March), Miles!  
Well, every year for Christmas, I like to choose a theme for the dinner menu.  Okay, I know, it's weird!  I've had to endure my share of teasing from the family ("Who knows what it will be for Christmas this year!).  I guess Marie has had to grow up with NO traditional family Christmas dishes, that's true, BUT, she certainly can't say we don't have any traditions-- no matter how unusual :)
We always have our Christmas dinner in the evening (see, there's a tradition right there!).  We wanted to see the opening of "Les Miserables" at the movie this year, so I decided to go with a French dinner afterwards!  I needed to have a menu that would be able to be prepared ahead of time; then we could just put everything on to cook when we returned from the movie.  I decided on Julia Child's "Braised Filet of Salmon" for the main dish and it was YUMMY!  I'll include that on the next post!  BUT for dessert, I made the traditional (there it is again!), Buche de Noel, the Christmas rolled and filled cake, and it turned out SO good!!  This is the perfect Christmas dessert-- you can do it way ahead and freeze it, it tastes wonderful and complicated (but it isn't), and it's really CUTE!  The little meringue mushrooms are the key to the cuteness factor-- but they can be SO easy to make (see shortcut below!).
Julia's Buche de Noel is probably scrumtious, but her recipe in "Mastering the Art of French Cooking" is pretty complicated.  To me, it's a bit much at the busiest time of the year!  So, I went with this recipe and added a simple, smooth chocolate buttercream icing.
Once you've made one of these and have the method down, the variations are endless!  Pumpkin Rolls for fall, Strawberry Rolls for spring, Peach Rolls for Summer-- your year in desserts is covered-- bring on 2013!

BUCHE DE NOEL(adapted from the McCalls cooking school recipe)
6 egg whites, room temperature (I microwave the eggs--in the shells-- until they lose their cool! Just a few seconds!) 
3/4 cup sugar
6 egg yolks
1/3 cup unsweetened cocoa
1 1/2 teaspoons vanilla extract
1 dash salt
confectioners' sugar
FILLING
1.5 cups heavy cream, chilled
1/2 cup confectioners' sugar
1/4 cup unsweetened cocoa
2 teaspoons instant coffee
1 teaspoon vanilla extract

Grease the bottom of a 15x10x1" jelly roll pan; line w/ parchment paper; grease slightly. Preheat oven to 375.
In a large electric mixer bowl, at high speed, beat egg whites until soft peaks form when beaters are slowly lifted.
Add 1/4 c sugar, 2 T at a time, beating until stiff peaks form when beaters are slowly lifted. Transfer the beaten egg whites to another large bowl.
With the same beaters and mixing bowl, beat yolks at high speed, adding remaining 1/2 c sugar, 2 T at a time; beat until mixture is very thick, about 4 minutes. At low speed, beat in cocoa, vanilla, salt, just until smooth.
With wide rubber spatula, gently fold cocoa mixture into egg whites just until blended (no egg whites should show). Spread evenly in pan.
Bake 20 minutes, just until surface springs back when gently pressed with fingertip.
Sift confectioner's sugar in a 15x10" rectangle on a clean linen towel.
Run a knife around the edge of the cake to loosen it.  Turn cake out on sugar; lift off pan; peel paper off cake.
Roll up cake jelly-roll-fashion, starting with the short end, towel and all. Cool completely on rack, seam side down.
FILLING: Combine ingredients in medium bowl. Beat with electric mixer until thick; chill while the cake cools.

TO ASSEMBLE: Unroll cake; spread with filling to 1" from edge; re-roll the cake.  This goes a lot easier than you think it will.  Use the tea towel to help you get started.
Place the cake, seam side down on a serving plate.  Cut off the two ends of the cake diagonally and save the ends to be "bumps" on the log.
You can now freeze the cake and the "bumps", covered with aluminum foil, to frost and decorate later.  If you do, frost the cake straight from the freezer and then put it in the fridge until serving time, or put it back in the freezer.  Allow the cake to sit at room temperature for an hour before serving if taken from the fridge, and about 1.5 hours if taken from the freezer (refrigerate leftovers!).

CHOCOLATE BUTTERCREAM FROSTING
4 oz. bittersweet chocolate, melted and cooled
10 TBL. unsalted butter, softened
dash of salt
1 cup powdered sugar
1/2 tsp. vanilla
Beat all ingredients until fluffy and softly spreadable.


MERINGUE MUSHROOMS
I use Wilton meringue powder to make two things: these mushrooms and royal icing.  Usually, I'm against this sort of thing, but meringue powder is JUST dried egg whites and if you use it, there isn't any worry about using raw eggs.  Plus, it is SO EASY and that's important at Christmas time!  Follow the package directions to make the recipe for meringue shells.  Put some parchment paper on a baking sheet.  Preheat the oven to 200F.
Put the meringue into a decorator's piping bag (or a plastic bag with a corner cut off) and pipe out buttons of meringue of different sizes.  Those are the mushroom tops.  Then pipe out some tall points.  Those will be the stems.  Don't worry about making them perfect-- they will look cute anyway-- I promise!!  Make extras because they taste delicious-- like toasted marshmallows-- and your family will sneak some for sure!
Bake for 1 hour, or until dry and slightly browned.  When cooled, dig out a little indention on the underside of a mushroom top with a knife.  Use frosting to stick the stem into the indentation.  There it is!
Marie helped me put the meringue mushrooms together.  She and her Dad were also constructing and decorating a gingerbread house (Miles was helping by eating the "extra" candy.), so she used royal icing to stick the mushroom stems to the tops.  You can use the chocolate frosting made above, too.
(Marie also took this excellent photo; however, I couldn't get how to publish it without the weird border-- sorry!)
Final Assembly!
Frost the cake ends and attach them to the log, either on the sides or on the top, whichever look you like.  Frost the whole cake except the ends (the swirled filling looks good!).  Use the frosting knife to make lines on your "log" to look like the bark.
Right before serving, put the meringue mushrooms here and there-- whatever way you like.  Put some fresh rosemary (just to look kind of "evergreen-ish") around the log if you want.  Sprinkle with a dusting of powdered sugar "snow".  Joyeux Noel!


Thursday, December 20, 2012

Sausage and Rigatoni

Do you like the Italian dish, sausage with peppers and onions?  I do, but for a lot of people, that's a lot of peppers and onions!  Here's a modification of that dish that combines sausage with green onions and cherry tomatoes.  The green onions add a light flavor without going overboard.  It was very popular at my house a few nights ago.  I used rigatoni pasta, but of course, penne or large shell pasta would work well also.  Recently, on a Lydia Bastianich cooking show, she talked about pairing the pasta to the shape of the other ingredients.  For example, she said bulky pieces, like slices of sausage, go well with bulky pastas, like penne or rigatoni.  If you are using long strands of pasta like spaghetti, you should cut your ingredients in similar long strands so that they will tangle up well with the pasta and not just sit at the bottom of the pan.  A-ha!!  That's how to get a pasta primavera to mix cooperatively!  Anyway, this is a very helpful rule of thumb and does work!
Also, how about sausages?  Usually, I like to buy the "house made" types from my local grocer, but I really like Pederson's sausage as far as a national brand.  It is made without preservatives, including nitrates and other not-so-good stuff.  It costs a bit more than similar products, but think about it, do you really want to buy a cheap version of sausage?!  There's a lot of trust there as it is !  Ha!  Well, hey, trust me, you'll like this!

Sausage with Green Onions and Cherry Tomatoes
1 lb. good quality smoked sausage, sliced about 1/4 inch thick
1 cup cherry tomatoes, halved
1 bunch green onions, sliced (use about 1/3 of the green stems)
1/4 cup white wine, broth, or pasta cooking liquid
1/2 cup grated Parmesan cheese
black pepper, salt
1/2 lb. rigatoni or penne pasta
Big pot of boiling, salted water to cook the rigatoni in

Brown the sausage slices in a skillet, turning to brown well.  Remove the sausages and pour out the accumulated fat.  
Pour the rigatoni into the boiling, salted water.  Stir occasionally so they don't stick.
Add the green onions and the tomatoes to the skillet.  Cook and stir until the onions are slightly wilted.  Add the sausages and stir to combine.
When the rigatoni are cooked, drain them (reserve some cooking liquid) and pour the pasta into the skillet.  Add the pasta water, broth, or wine and cook a minute or two, stirring.  Add the cheese and black pepper and stir until combined and the cheese is somewhat melted.
Serve in bowls with extra grated cheese if desired.

ASB

Wednesday, December 12, 2012

Weeknight Arroz Con Pollo


Anytime a recipe title says "Weeknight", it's a signal that the recipe should be quick and tasty AND flexible-- something that can be put together after you come home from work.  It shouldn't take particularly special ingredients, and it's really good if you can make lots of substitutions so you don't have to go to the grocery store on the way home!  (I LOVE going to the grocery store and even I don't much like doing that at the end of a long day.....Sometimes I do and in fact, sometimes it re-energizes me!-- but I digress....)
This recipe for Arroz Con Pollo meets all the "Weeknight" recipe criteria.  It uses everyday ingredients, putting it together is a snap, and it is a very tasty rendition of the traditional Mexican chicken and rice dish.  Ordinarily, I like to put chiles in it (Hatch, poblano, or jalapenos), but this time I didn't because Ben had some tummy trouble a few days ago and I didn't want to aggravate anything!  
If you don't have a particular ingredient, feel free to substitute!  Really, the only thing you HAVE to have for Arroz con Pollo is the arroz (rice) and the pollo (chicken)!

Weeknight Arroz Con Pollo (serves 3-4)
1 lb. chicken tenders, or breasts, or thighs  
1 onion, chopped
1/2 lb. fresh mushrooms, sliced
1, 4oz. can sliced pimentos (this you might not have, but you can use chopped green pepper, or the above suggested chiles)
1 garlic clove, chopped
1/4 cup sliced olives (black, green, Kalamata, plain or fancy-- whatever you have)
1 can chicken stock diluted to make 2.5 cups liquid, or all chicken stock if you have it            (if you don't have stock, use part white wine and water, or just water)
olive oil
salt and pepper
1 cup uncooked white rice
1/2 cup frozen peas or baby lima beans

In a big non-stick skillet, put in about 2 Tbl. olive oil.  Sprinkle the chicken with salt and pepper and brown quickly on both sides, but don't cook through.  Remove to a plate.  Add a bit more oil if necessary, the chopped onion, mushrooms, and garlic.  Sprinkle with salt and pepper and saute over medium heat until fragrant.  Add the white rice.  Allow to cook further, stirring once in awhile, until the rice browns a little and the mixture smells really good!
Put the chicken back in along with the olives and pimientos.  Pour in the chicken stock carefully-- it might go crazy because of the hot rice.  Sprinkle the peas or limas over all.
Cover and cook for 20 minutes on medium-low heat.  Stir around fairly well.  Cover and cook another 5-10 minutes, until the rice is cooked through.  
Ole!


Wednesday, December 5, 2012

Apricot-Almond Biscotti

 Biscotti-- those lovely crisp slices that make a cup of coffee an event-- I love them!  They seem so straightforward too:  a hard cookie with fruit and/or nuts baked in.  How difficult can that be?  Well, if you've ever tried to make them at home, you know!  For one thing, recipes for "biscotti" can result in everything from a soft, rich pastry like cookie (delicious, but hardly up to a dunk into a cup of expresso!) to a tooth-cracking dog biscuit (for people!)!  I've tried all kinds of mixtures with all kinds of results.  To me, biscotti is a fairly hard cookie with pronounced flavor and a texture that is rather coarse, but definitely not crumbly.  It needs to stay intact after soaking up some coffee, not fall apart into crumbs throughout your drink-- ick.  Anyway, this is a recipe from an old "Gourmet" magazine.  Wow!  Now that was a magazine for cooks-- but don't get me started.  "Gourmet" isn't around anymore, but thanks to the Internet, a lot of their recipes are.  To me, this recipe makes the perfect biscotti.  It's very adaptable also, that is, you can vary the fruits and nuts, make the biscotti plain, or vary the flavorings.  They can be dipped in chocolate or white chocolate (fancy!), and they survive mailing very well-- Christmas gift!  Biscotti are kind of pricey at the store, so making them is economical also.  Here are some tips to making any biscotti recipe.
1.  If the recipe calls for a large proportion of butter to flour (like 1 cup butter to 2-3 cups flour), the biscotti are going to be softer and more cookie-like.  This isn't bad, and they'll taste good.  It's just something to know if you are expecting the traditional type.
2.  Use chopped nuts, not whole ones.  The whole ones look great in cross-section, but it is really difficult to slice through these large pieces cleanly. 
3.  Toast the nuts for 7-8 minutes at 350F before using them.  It makes a difference.
4.  Slice the biscotti with a sharp chef's knife.  Slice straight down with conviction-- don't use a sawing motion or you'll have crumbled edges.
5.  No biscotti recipe I've ever made makes the amount the recipe claims.  If fact, you'll get only about 1/2 the amount, so plan accordingly!
Now, here's the recipe!
Apricot-Almond Biscotti (makes about 2.5 dozen cookies-- really!)
2 cups flour
3/4 cup sugar
1 1/2 teaspoons baking powder
1/2 teaspoon salt
1/2 stick (1/4 cup) cold unsalted butter, cut into small pieces
1 whole large egg, lightly beaten
1/3 cup whole milk
1/2 teaspoon vanilla extract
1/4 teaspoon almond extract
1 cup chopped almonds (5 1/2 oz), toasted and cooled
1 cup dried apricots (6 oz), quartered
1 large egg yolk beaten with 1 tablespoon water for egg wash

Preheat the oven to 350F.  Line a sheet pan with parchment paper.  Tear off two sections of Saran wrap, about 15 inches long.
In a stand mixer, mix the flour, sugar, baking powder, and salt together.  Add the butter and mix on low until the mixture looks crumbly.  Add the egg, milk, vanilla and almond extracts.  Mix well.  Add the almonds and mix.  Add a few more drops of milk if the mixture is too dry to come together into a dough.
Divide the dough in two and put one section on each piece of Saran wrap.  Fold some Saran over the dough and pat it into a disk about 5-6 inches in diameter.  Place 1/2 of the apricots on the dough and fold it over, sandwiching the apricots between the dough.  Fold the Saran over the dough and work / roll it into a log about 14 inches long.  Try to get the ends as thick as the middle of the log, but don't worry if it's not like that.  Pick up the log with the Saran and then unwrap it onto one side of the baking sheet.  Repeat with the other portion of dough and put that log on the other side of the baking sheet.  They won't rise much, but you want them to be far enough apart so they don't touch and bake evenly. 
Brush the logs with the egg wash.  Bake them for 20 minutes, or until they seem dry and cracks appear all over the logs.  They should feel firm.  If your logs are a little thicker than specified, just bake a little longer.
Remove the logs from the oven and allow them to sit for 20 minutes.  Reduce the oven temperature to 300F.
Carefully lift one log onto a cutting board (don't worry if it breaks-- you're going to cut them up anyway!).  Cut the biscotti into about 1/2-inch slices and put them on the same parchment baking sheet, curved sides up.  Repeat with the other log.
Bake the biscotti for 30 minutes.  Remove them from the oven and allow to cool.  They will crisp up even more. 
Store air tight at room temperature, or freeze!  Yum!
ASB


Saturday, December 1, 2012

Easy Baked Chicken Parmesan

 Did you ever see the movie, "The Big Night"?  It's about an Italian immigrant that opens a restaurant in the USA.  He wants to serve very authentic dishes to his customers, but they come expecting the traditional Italian-American restaurant dishes that ALWAYS come with a "side order of spaghetti".  One diner insists on the "side order" with his risotto, which sends the purist chef / owner into a rage and so moves the plot forward (I won't ruin it for you-- watch it sometime-- it's really good!).  Anyway, another Italian-American favorite that usually comes with a "side order of spaghetti-- which I LOVE by the way- I'm no purist!) is Chicken Parmesan!  BUT, I promise your family won't miss the pasta with this yummy version, especially if you have some good bread with it!
Like a lot of Italian dishes, Chicken Parmesan is a favorite of all ages.  Children and adults love the cheesy, saucy, crispiness of this lovely dish.  It hits all the "likes" for most tastes.  
The traditional recipe for Chicken Parmesan is time consuming and heavy in calories:  pound out filets, bread and saute them, etc., etc.  This is my adaptation of a recipe for a baked version that is just as delicious, but baking the chicken and splitting the chicken breasts instead of the pounding and pan sauteeing makes this version much easier and even lighter!  You'll still get all the goodness of the crisp exterior, tender chicken, and the cheese / sauce.  Another nice thing is you can get all the "parts" necessary together ahead of time, then just assemble and bake when you're ready.  This makes it great for entertaining!  Also, I always use a jarred  tomato-basil marinara sauce for this recipe.  It tastes great and what's the use of an "easy" recipe if part of it involves spending hours making one of the components!?  Serve with foccacia bread (previous post -- or buy it!) and a green salad.  That's amore and your own "Big Night" at your house!  Ha!

Easy Baked Chicken Parmesan(serves 6)
1.5 cups Panko breadcrumbs
1 Tbl. olive oil
1/2 cup grated Parmesan cheese
1/2 cup flour
1.5 tsp. garlic powder
Salt and pepper
3 egg whites
1 Tbl. water
3 rather large chicken breast halves (boneless, skinless, and partially frozen if possible)
1 jar marinara sauce (you won't use all of it-- use the rest for a pizza!)
1.5 cup shredded mozzarella cheese
Spray a baking rack with PAM and put it on a sheet pan.  If you don't have one, you can line a sheet pan with a piece of aluminum foil that has been crumpled up, then un-crumpled and sprayed with PAM.  This won't work as well, but it will work.  
Mix the Panko and the olive oil in a frying pan and toast the breadcrumbs, stirring all the while, until they are golden brown.  Set the pan off the heat and allow the crumbs to cool, then mix in the Parmesan cheese. 
Mix the flour, garlic powder, 1 Tbl. salt, and 1/2 tsp. pepper in a shallow dish.  Set aside.
Mix the egg whites and water with a fork in another dish.  Set aside.
Halve the chicken breasts horizontally.  Do this by starting at the thick end of the breast and moving your thin, sharp knife through the breast in a sawing motion.  This is a lot easier if the breasts are still partially frozen.  Hold your hand on top of the breast to steady it as you cut, but be careful!  If it doesn't go exactly right-- don't worry!  It will look and taste fine.  You can even just cut them in two cross-wise, then cut only the thick pieces horizontally.  If you do this, they will bake about 5 minutes quicker.  Sprinkle the breasts with salt and pepper.
Now dip a breast into the flour mixture, shaking off the excess.  Then dip into the egg mixture, then into the panko-cheese mixture.  Turn and press the cheese-panko mixture all over the breast.  Put it on the baking rack and repeat with all the chicken.  Spray the tops of the chicken breasts with a light coating of PAM.
Bake for about 20 minutes (little more or less, depending on how frozen the breasts were).  You can cut one open discreetly to check; the meat should not be pink in the center.  Remove the chicken and top each one with a generous amount of marinara sauce and a mound of mozzarella cheese.  Put back into the oven for another 5 minutes, until the cheese is melted and everything looks scrumptious!  
Use a spatula to remove the breasts and serve!

ASB


Wednesday, November 28, 2012

Salted Foccacia Bread-- More Fun with Yeast!

 Hello, Everyone!  Hope you all had a terrific Thanksgiving with lots of family, friends, and food!  Isn't Thanksgiving great?  It's a holiday set aside to give thanks for every blessing around a table of dishes everyone looks forward to all year!  Now, that's a good day!  Of course, any holiday that involves people (which is most of them!) isn't going to be perfect, but still, it's hard to be grumpy when your plate is heaped up with mashed potatoes!
Anyway, I know my last post was a yeast recipe, but I'm having fun these cooler days with homemade breads.  Here's a recipe I developed for salted foccacia bread that is easy and makes three loaves.  They freeze really well.  Now, here's the thing, a loaf of homemade bread makes any meal a LOT better, so when you're busy with all the activities of the holiday season and dinner is soup from a can-- whoa!-- you have a loaf of homemade foccacia in the freezer!  Just heat and serve--you've got it SO together! You're Super Chef!

Salted Foccacia Bread
Flour (about 4 cups, but you can figure that out later)
2 pkg. active dry yeast (I like the "Rapid Rise" kind)
1/2 cup olive oil, plus more for drizzling later
1 Tbl. salt, plus more for sprinkling later
3 cups warm water (test with a drop on the inside of your wrist-- you shouldn't feel anything or just barely warm)
1 Tbl. sugar
Spray 3,  9-inch cake pans with PAM.  Set aside.
In the bowl of a stand mixer with the paddle attachment, mix the warm water, yeast, oil, and sugar well. Go away for 15 minutes.  When you return, there should be lots of bubbles on the surface of the liquid.  Add about 2 cups flour and mix until smooth.  Add the salt and mix again.  Now keep the mixer on low speed and add flour until you get a very soft, sticky, stretchy dough.  It might take another cup or more.  A lot depends on the humidity, but just make sure you don't add too much flour.  A wet, sticky dough is best-- like it would barely hold it's shape if dumped out of the bowl.  Don't fret about whether the dough is the exactly right consistency.  Later, once you douse the whole thing in olive oil, all "problems" will vanish-- I promise!  Keep mixing the dough on low until it is smooth.  It will be extremely stretchy.  Remove the bowl, spray the top of the dough with a light coating of PAM, and cover with a piece of Saran wrap and then a tea towel.  Place in a warm place (at least 75F if possible) and allow to rise about 1 hour.  
After an hour, check the dough.  It should have risen to the top of the bowl.  If not, allow to rise a bit longer.  Remove the plastic wrap and stir down the dough with a wooden spoon that has been sprayed with PAM (dough doesn't stick so badly that way).  Put olive oil on your clean palms and separate three blobs of dough into the prepared cake pans.  Don't worry if they are super rough looking, but try to get about the same size blob into each pan.  Cover the pans with the tea towel and allow to rise again about 20-30 minutes.  Preheat the oven to 375F.
Now comes the fun part!  Put olive oil on your clean hands again and use your fingers to punch depressions all over the surface of the loaves.  Use a tablespoon to drizzle generous amounts of olive oil over each loaf.  I use about 1-2 tablespoons per loaf; be generous-- it's pretty hard to get too much!  Use your fingers to lightly rub the oil over the surface of the loaves.  Sprinkle each loaf with salt-- coarse Kosher salt is good if you have it, but sea salt is good also.  Bake the loaves for about 30 minutes, until they are brown and beautiful!  Eat right away or cool completely, wrap well in aluminum foil and freeze.  
To reheat, unwrap and heat in the oven for about 20 minutes at 350F.
Too many bread posts?  Okay, okay, next post will be a super easy chicken Parmesan-- goes great with the foccacia bread! :)
ASB


Monday, November 19, 2012

Thanksgiving Day Breakfast-- Homemade Cinnamon Rolls


Okay, I have a LOT of stuff to get done for Thanksgiving, but I'm taking a break to tell you all that the cinnamon rolls recipe from "The Pioneer Woman Cooks" cookbook by Ree Drummond really are worth making for your Thanksgiving Day breakfast!!  They are easy and come together pretty quickly for homemade rolls.  Also, they use yeast AND baking soda AND baking powder, so don't worry, they are going to rise!  The icing is wonderful-- maple and coffee flavored!  Ms. Drummond says they can be frozen already iced and then warmed in the oven for 15 minutes.  This is a very useful thing when the oven is going to be busy all day!
I changed a few things, and there are a few things to note about my experience with the recipe.  Instead of brewed coffee for the icing, I used expresso powder to make the amount of coffee I needed.  Somewhere in the past I read that when using coffee as an ingredient, it's better to make it from expresso powder because it keeps the flavor better in the finished product.  You can find it at any grocery store and it's inexpensive.  Also, I used only 1/2 cup melted butter inside the rolls, then drizzled the other 1/2 cup over the cut surfaces of the rolls once they were in the baking pans.  The recipe says to use the whole 1 cup inside, but so much would run out onto the counter it seemed like a waste.  This way, you keep all the butter where it belongs-- with the cinnamon rolls!  I made 1/2 the recipe because even that made 20 cinnamon rolls, which are plenty if you don't have a bunch of ranch hands to feed along with your family like Ree Drummond!  Lastly, I mixed a portion of the cinnamon into the dough itself because my son-in-law, Miles, said this is a "must have" feature of the proper cinnamon roll.  I agree!  Don't worry if the dough seems really soft.  I thought it would be a problem, but they turned out great and the soft dough absorbs all the butter and icing even better!
Well, I'd like to visit all evening, but hey-- I'm busy here!  So, this is the recipe with my changes--oh, and Happy Thanksgiving!

Cinnamon Rolls (adapted from the "Pioneer Woman Cooks")
Dough:
2 cups whole milk
1/2 cup vegetable oil
1/2 cup sugar
1 package active dry yeast (I used the "Rapid Rise" type)
4.5 cups white flour
1/2 heaping tsp. baking powder
1/2 tsp. baking soda
1.5 tsp. salt
2 tsp. ground cinnamon
Filling:
1 cup melted butter
1 Tbl. + 1 tsp. ground cinnamon mixed with 1 cup sugar
Icing:
1 pound powdered sugar
1/2 cup whole milk
3 Tbl. melted butter
1 tsp. expresso powder dissolved in 2 Tbl. boiling water
Dash of salt
1.5 tsp. maple flavoring

Spray 4, 9x9 square disposable aluminum pans or regular baking pans (I don't have that many!) with PAM. Heat the milk, oil, and sugar in the microwave for 1.5 minutes, or until just barely warm.  Stir to dissolve the sugar.  Pour into the bowl of a stand mixer with the paddle attachment.  Sprinkle the yeast in and stir to dissolve.  Go away for 10 minutes.  There should be lots of bubbles on the surface of the mixture.  (These instructions are also a little different from the cookbook, but it works better for me-- so maybe it will for you also!)
Add 4 cups of flour and stir to combine, but leave it lumpy and rather rough looking.  Don't overmix.  Cover with a clean tea towel and set in a warm place for 1 hour.
The dough should be risen about double now.  Put the bowl back on the mixer.  Add the baking powder, baking soda, salt, 2 tsp. cinnamon, and 1/2 cup flour.  Stir thoroughly, making sure everything is mixed in well.  Let the dough rest about 10 minutes.
Get a large, clean tea towel and put it on the counter.  Sprinkle flour all over the towel.  Dump out the dough (it will be soft) and roll it to a big rectangle about 10 x 30 inches.  Pour 1/2 cup melted butter on the surface using your fingers to spread it all over.  Sprinkle the cinnamon sugar over the surface.  From the short end, roll the dough, lifting the edge of the tea towel to help you roll it up as evenly and tightly as you can.  
Using a sawing motion, cut the dough into 20 slices using a floured, serrated knife.  Place them cut side up into the prepared pans.  I fit 5 per pan.  Drizzle the remaining 1/2 cup melted butter over the cut surfaces of the rolls.  Cover them with a towel and let rise 20-30 minutes.
Heat the oven to 375F.
Bake the rolls for 13-17 minutes, until golden brown.  
Mix all the icing ingredients with a whisk and pour / spread all over the rolls while they are hot.  
If you're going to freeze them, allow to cool, wrap well with aluminum foil and freeze.  Yay!  


Saturday, November 10, 2012

Can She Bake a Cherry Pie?

 
Have you ever heard that folksong.....something something, "Billy Boy, Billy Boy" ?  At some point the singer asks "Charming Billy" whether his new wife can bake a cherry pie.  He says, "She can bake a cherry pie quick as a cat can wink his eye!  She's a young thing and cannot leave her mother."  Evidently, as long as his new wife could bake a cherry pie quickly, it was fine with him if she lived with her mother.  I don't know anyone that likes cherry pie that much, but I do know that for some reason, a lot of men like cherry pie-- at least the ones I know!  It is definitely one of Ben's favorites!
Here's the thing about cherry pie:  some people won't even touch one unless it's made completely from scratch, and some people like only the kind made with canned pie filling.  There's no middle ground here that I can tell.  I think, like a lot of things, it's a product of your childhood.  If you grew up with a mom that liked to cook and maybe in the country where fruit was either fresh or home canned, then you probably are a hold out for the "from scratch" pie.  BUT, if you grew up loving those packaged fried pies that were sold at every 7-11 type store around the country, then nothing beats that thickened, sweet, bright red stuff!  We like what we like!
If you haven't joined either side yet, or you like the "from scratch" type of pie, then try this recipe.  As far as fruit pies go, cherry is one of the easiest and most reliable.  If you don't make pie crust (another blog!), the ready made kinds are good, or the boxed pie crust mixes are fine.  As we say in yoga, "No judgments!"  Ha!
Cherry Pie
Pastry for a two-crust pie
2 cans tart cherries, packed in water
3 Tbl. cornstarch
1 cup sugar
1/2 tsp. almond extract
1 Tbl. butter
few drops red food coloring (this can ease the pain for the canned filling fans, but it's optional, of course!)
Line an 8-inch pie plate with pastry.  Preheat the oven to 425F. 
Drain the cherries, reserving one cup cherry juice.  Put the sugar and cornstarch in a saucepan and stir to mix well.  Add the cherry juice.  Cook and stir over medium-high heat until the mixture bubbles and thickens.  It will be translucent.  Take off the heat and add the butter and flavoring.  Mix well.  Add the food coloring if using.  Stir in the drained cherries.
Roll out the rest of the pastry and cut strips (a bit over 1/2 inch or so wide).  Pour the cherry filling into the pie plate and top with the pastry strips to make a lattice pattern.   There is a procedure for making a real, woven lattice top, but it doesn't seem like a good use of time to me!  I just go across and across the other way.  No one's said anything so far!  (Maybe people are keeping their complaints to themselves-- aren't they nice?!  Choose friends carefully!)  Go around the edge of the pie with a fork, pressing down to seal the two crusts together well.  Sprinkle the top with sugar if you want.
Put the pie on a foil lined cookie sheet (It will probably bubble over, and this saves you a mess in the oven.).  Bake for 10 minutes.  Reduce the heat to 350F and continue baking for 45-50 minutes, until browned and bubbling.  Allow to cool before slicing.
ASB
This recipe makes 4 cute mini-cherry pies also!


Saturday, November 3, 2012

Easy Little Cookies!

 
I had some fun today making meringues!  They are easy, take few ingredients, and are delicious!  They also happen to be fat free!  Of course, there is the sugar............well, it's a cookie for gosh sakes! ;)
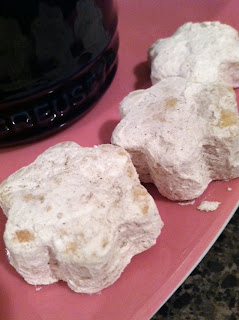
Also, if you saw my previous post about Mexican food, I included a picture of these shortbread cookies and wanted to give you all the recipe for those.  These are such cute little bites, made with shortening instead of butter, but still super delicious with the powdered sugar, cinnamon, and cardamom coating!  Without the powdered sugar, these cookies freeze well.  You can just dust them before serving.  They go perfectly with a cup of coffee! 
Both of these cookies take very few ingredients and just a few minutes to pop in the oven.  The meringues have to bake awhile, but that's just work for the oven!  They are flavored with vanilla and contain chocolate mint chips.  I tinted them green just to make them pretty and "minty", but of course, that's optional.  Meringues are great to make when you want to use up extra egg whites.  I store egg whites in the freezer, then  when I have a lot, I usually make an angel food cake. Now though, I might start making meringues instead! 
Note:  If you live in a humid climate, make meringues on a cool, dry day.  That way they will stay crisp if stored in an airtight container.  They don't stay fresh more than a couple days though, so you have to eat them up!  Oh, well!
MEXICAN SHORTBREAD COOKIES
1 lb. flour (about 3.5 cups)
1 cup, plus 2 Tbl. shortening (not butter-- makes a difference)
1 cup sugar
1/3 cup rum (dark or light)
2 cups powdered sugar
2 tsp. ground cinnamon
2 tsp. ground cardamom
Line some cookie sheets with parchment paper and heat the oven to 350F.
In a stand mixer, mix the flour, sugar, and shortening together.  Add the rum.  The dough will be stiff, but should stick together.  If it's dry, add more rum or water.
Gather the dough into a flat disk, pressing it altogether.   Roll the dough to a thickness of 1/2 inch on a clean, floured tea towel.  A piece of plastic wrap over the top of the dough helps it to roll out without sticking.  Remove the plastic, and cut the dough into shapes with small cookie cutters (ones about 1.5 inch diameter are best).  Place on cookie sheets about 1-inch apart and bake for 12-15 minutes.  Don't underbake.  They take awhile because they're rather thick. 
Allow to cool, then toss the cookies around in a zip lock bag filled with the powdered sugar, cinnamon, and cardamom.  Remove and serve!
CHOCOLATE MINT MERINGUE COOKIES
2 egg whites
pinch of cream of tartar
1 cup sugar
1/2 tsp. vanilla
5-6 oz. mint chocolate chips (I use Andes Mint Chips)
green food coloring (optional)
Heat the oven to 200F and line 2 cookie sheets with parchment paper. 
In a stand mixer, beat the egg whites and cream of tartar together until pretty stiff.  Add the sugar then, a bit at a time, and continue beating into very stiff peaks.  Beat in the vanilla and green food coloring until you like the color.  Rub a little of the meringue between your fingers.  You should not feel any of the grainy sugar.  If you do, keep beating until you don't.
Fold in the chips.  Using two tablespoons, drop dollops of meringue on the prepared cookie sheets.  The dollops can be fairly close together; they don't spread.  Bake both sheets at one time for 1 hour, or until the cookies are completely dry and crisp. 
Store in an airtight container.


Cheesy Potatoes

 Although they're out of favor with some anti-carb nutritionists, I love potatoes!  My uncle grew them on his farm in Colorado and we were never without the round, red-skinned type that thrived in that climate.  One year Easter came early and their store of farm potatoes was gone.  When my mom said she would make the scalloped potatoes for Easter dinner, my aunt was incredulous, "You still have potatoes?!" she inquired?  "There are grocery stores!" was my mom's exasperated reply, but I had to laugh because I knew no way was my auntie going to trust anyone's potatoes except the ones THEY grew!  I'm not sure if she ate the scalloped potatoes that Easter or not, but I doubt it!
Anyway, I came up with this recipe for Cheesy Potatoes one weeknight when I wanted to serve a yummy side dish, but didn't have time for the long cooking required for scalloped potatoes.  They have a hint of garlic to them also, which really adds to their flavor.  The recipe can be doubled easily, and they even taste good reheated!  
If you don't have Colorado potatoes for this recipe, it will still be edible :) And if you don't have potatoes, well, there are grocery stores!  HA!

CHEESY POTATOES (serves 4 as a side dish)
4 medium potatoes (red-skinned, Yukon gold, or even russets will do)
1 clove garlic (smash on a cutting board with the flat side of a Chef's knife, the skin comes right off)
1.5 cups grated sharp cheddar cheese
2 Tbl. flour
2 Tbl. butter
1.5 cups milk
salt and pepper
1 qt. casserole dish, sprayed with PAM or buttered (better!)

Oven at 350F.
Peel the potatoes and slice about 1/4 inch thick.  Put in a pot and cover with cold water.  Throw in the smashed garlic.  Add about 2 tsp. salt to the water.  Boil the potato slices until they are just tender, about 10-15 minutes.  Try to not get them overdone, but if you do, don't worry about it!
Drain the potatoes and garlic in a colander.  Set aside.  
Melt the 2 Tbl. butter in the same pot and then add the flour.  Stir around until it gets bubbly, but be careful not to burn the mixture.  Off heat, stir in the milk.  Cook and stir over medium-high heat until the sauce gets smooth and thick.  Remove from heat.  Add about 1/2 of the cheese to the sauce and stir.  Add salt and pepper to taste.  
Put the potatoes and garlic back in the pot and stir carefully to coat with the cheese sauce.  Pour into the casserole dish.
Bake for 20-25 minutes, until hot and bubbly.  Allow to sit about 5 minutes before serving.
Yummy!

Note:  Doubled, or even tripled, this is a good recipe for a potluck because it stays hot for a long time.  Increase the baking time about 15 minutes if you double the recipe.


Sunday, October 28, 2012

Mexican Chicken and Spinach Casserole


Here in San Antonio, Texas, we love our Tex-Mex.  Mostly, we don't concern ourselves with what is "authentic, regional Mexican cuisine" and what is something Mexican Americans (or cowboys) developed later.  We like what we like!
Sometimes though, despite ourselves, we get an education regarding the varied and wonderful dishes that really are native to Mexico.  In the '90s, there was a revival of interest in Frida Kahlo, painter and wife of Mexican artist Diego Rivera.  "Everything Frida" was pretty trendy in those days, so of course, there had to be a cookbook!  Written by her stepdaughter, it had beautiful pictures of the dishes and interesting essays on the artists' lives.  I bought it mostly because the stories were interesting, but it turned out to be one of my favorite cookbooks, and I've made quite a few dishes and did learn a few things about "real" Mexican food-- mostly that it's really tasty!
This casserole has lots of spinach and is fairly light.  I streamlined it a bit from the original recipe, changed some proportions (I think something was lost in the translation from metric to English measurement!), and added the chicken, which I think is very tasty with the spinach sauce and chile.  The chile flavor is subtle, but adds a lot of interest! If you don't have a food processor, you can process the sauce in a blender.  Pour in some of the cream sauce and it will all blend up beautifully!
P.S.  Like the paper flowers?  I'm making them now!  Ole! :)

Mexican Chicken and Spinach Casserole

About 2 cups cooked chicken (leftovers are good, OR shred up part of a rotisserie chicken OR simmer a couple chicken breasts in salted water for about 20 minutes)
12 oz. frozen spinach
1 serrano chile
2 T. butter
2 T. flour
1 cup milk
1/4 cup cream
8 oz. penne pasta or elbow macaroni
1/4 cup Parmesan cheese
Salt and pepper

Spray with PAM or butter a 2 qt. casserole.  Preheat the oven to 350F.
Boil the pasta according to the package directions in salted water.  Drain well, rinse under cold water, and set aside.
Cook the spinach in the microwave for about 3-4 minutes.  It should be hot and completely thawed.
Squeeze out most, but not all of the moisture from the spinach.  It doesn't have to be super dry.
Chop the serrano chile coarsely.  Use the seeds if you like a spicy dish, or remove them for a milder one.
Mix the spinach and chile in a food processor until chopped finely.
Melt the butter in the pot you cooked the pasta in.  Add the flour and cook briefly, stirring.  Add the milk, cream, and salt and pepper to taste.  Cook and stir with a whisk until thickened and smooth.  Stir in the spinach / chile mix.  Taste to see if you need to add more salt and/or pepper.  T
Add the pasta and chicken and mix thoroughly and turn into the baking dish.  Sprinkle with Parmesan cheese.
Bake for 25-30 minutes, until bubbly and browned.


These Mexican shortbread cookies are fun to make!  Another post coming soon! :)

Sunday, October 21, 2012

Memories of Meyer Lemons and More!

Before I talk about Meyer lemons, I wanted to let you all know about another super cute blog, "Little Kitchie" !  It's written by Marie, my daughter.  You might have read her guest blog post here a while back.  Her first post is for the most scrumptious looking black pepper and gruyere popovers!  Here's the link:
http://littlekitchie.blogspot.com/  
Marie and I like to exchange recipes and she thought this would be a fun way to do that and to share with you all as well!  I agree!  
Well, nowdays Meyer lemons are everywhere, but these lemon-orange hybrids used to be mostly a California, regional fruit.  As a child, I lived in southern California and my mom and dad owned and operated a nursery.  We lived on the property, and I have so many fun memories of playing among all the plants with my cousins.  Easy to grow, prolific and fragrant, my parents sold a lot of Meyer lemon trees, and it was really quite awhile before I knew lemons did not generally mean Meyer lemons!  One whiff of that lovely, floral frangrance definitely takes me back to those days in Garden Grove when there were still strawberry fields and orange groves among the growing subdivisions. A few days ago, my friend, Julie, called and she was making Meyer lemon pudding cakes.  Just hearing that name made me a little nostalgic.  Then yesterday at the Farmer's Market, there they were and on sale for a great price!  Since imitation is the most sincere form of flattery (right, Julie? :) ), I decided to make Meyer lemon pudding cakes too!  These luscious little desserts are so fun to make!  They bake up with a tender, moist, spongey cake on top and a creamy, citrus-y flavored pudding on the bottom-- magic!  They are wonderful served warm or cold.  If served warm, they are cozy and comforting.  If served cold, they are refreshing and bright.  It's a win-win!  One warning though:  they "go down easy" and before you know it, you're finished and are thinking you certainly could eat another one!  Ben ate THREE of these in less than a 12-hour period.  Uh-oh, it might be awhile before I can make these again, but I'm sure your family has more will power :)
NOTE:  This recipe can be made with regular lemons also.  If you do, they are every bit as delicious!  Use 1 more tablespoon of sugar than called for in this recipe though.  

Meyer Lemon Pudding Cakes
2 Tbl. butter
1/3 cup sugar
2 eggs, separated
3 Tbl. flour
1.75 cups milk
1/4 cup Meyer lemon juice
1 Tbl. grated Meyer lemon peel

1.  Preheat oven to 350F.  Set a kettle of water on medium heat.  Get out a 13"x9" pan and set 6, 6oz. ramekins in the pan.  You can also make this recipe in an 8x8-inch baking dish.
2.  In a large bowl, beat the butter and sugar together well.  Beat in the egg yolks until blended.
3.  Add the flour and blend well; then add milk and juice.
4.  Beat the egg whites until soft peaks form when you lift the beaters. 
5.  Fold the egg whites into the lemon mixture using a large rubber spatula.  Fold in the lemon peel.  Don't over mix; the mixture will appear mostly smooth with a few small lumps.
6.  Pour the mixture into the ramekins or baking dish.  By now the kettle should have boiling (or very hot) water in it.  Pour water into the 13x9 dish, all around the ramekins to a depth of about 1 inch.
7.  Carefully, put the pan in the oven and bake the ramekins for 25-30 minutes, or the 8x8 dish for 40-45 minutes.  A knife inserted in the center should come out clean when they are done.
8.  Remove carefully from the water and let stand at least 15 minutes before serving.  Or cool and refrigerate to serve cold.
Right before serving, you can sprinkle them with powdered sugar or not-- they taste wonderful either way!
Refrigerate any leftovers-- a yummy midnight snack-- ask Ben :)
ASB

Monday, October 8, 2012

Tastes Better the Next Day: Gumbo!


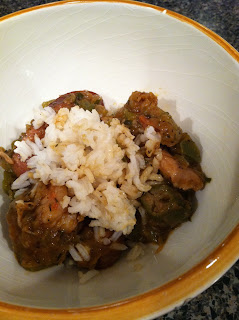
If you've ever cooked at all, you probably already know there are some things that taste a lot better the next day.  Just about anything that is simmered on the stove for awhile tastes even better when allowed to sit in the fridge overnight.  Stews, chili, soups-- all these really gain depth after a rest in the refrigerator.   Cajun or Creole Gumbo is another one of those dishes and that is really great news for the cook!  Gumbo contains a number of ingredients and there are several steps in the cooking process, but all the preparation can be done the day before your guests arrive (makes a LOT, so it's definitely one of those dishes to be shared!), and the next day, after re-heating it, you have something even more wonderful! 
If you need a dish that feeds a lot of people, doesn't require a lot of "go withs", can be made ahead and tastes great, gumbo is a great choice.  I adapted this recipe from a little card I got  from the Texas Agricultural Extension Service a long time ago.  Ben and I stopped at a park center on the way to Corpus Christi and there were all kinds of free recipe cards for different sea food dishes popular on the Gulf Coast.  I gathered up a few, not thinking they would be that wonderful-- but they were free!  It turns out these Ag Extension home ec ladies really know their stuff and I've made many of the recipes over and over. 
As I said, it takes awhile to put this recipe together, but it is worth every minute and the next day when you're already to feed your hungry group, you'll feel every bit as competent and organized as one of those home ec ladies!  Be sure to wear a cute apron :)

Chicken, Sausage and Shrimp Gumbo (serves 6 as a main dish)
1 lb. cut up cooked chicken meat (I take the meat off one of those roasted chickens.)
1 lb.  sliced smoked sausage
1 lb. shrimp, peeled and deveined (I remove the tails also)
1/3 c. flour
1/3 c. vegetable oil
2 c. chopped onions
2 c. chopped celery
1 c. chopped green pepper
1, 10-12 oz. pkg. frozen sliced okra
1, 8oz. can tomato sauce
1/4 c. chopped flat leaf parsley
1, 13oz can chicken broth
3 bay leaves
2 T Worcestershire sauce
1 T dried thyme
2 t. each garlic salt and pepper
1 t. Tabasco sauce 
Salt to taste
cooked white rice (prepare 2 cups dry rice)

Heat oil in a large cast iron skillet, if available (I use a Dutch oven).  When hot, add the flour and stir constantly with a wire whisk until dark and smooth.  Add vegetables, except okra, and cook until tender.  Add tomato sauce, 2 c. water, and chicken broth.  Add all the seasonings.  Simmer 1 hour. 
Meanwhile, lightly brown sausage slices in a frying pan.  Drain them well.
Add the chicken, sausages, raw shrimp and okra to the Dutch oven.  Simmer for 15 min.  Make sure shrimp are pink and cooked through.
Allow the mixture to cool down off heat, stirring every once in awhile, then refrigerate overnight-- don't cover it until the mixture is completely cold.
Re-heat in the oven (less chance of burning), covered, for 45 minutes at 400F, or until simmering.  Keep warm on top of the stove until serving time.
Serve with a scoop of hot rice.

I also like to serve crusty French bread with it and a fruit type dessert!
ASB


Monday, September 24, 2012

Dove Season and the "New" Cookbook

It's dove season here in South Texas and that means Ben is out every chance he gets-- on the hunt to "put food on the table" as he puts it.  He likes to pretend he doesn't know how food gets "on the table" when it isn't dove season, I guess.  Anyway, people have all sorts of ideas about hunting, but in Colorado (where we grew up) and in Texas (where we live now), it's a way of life, so I figure the best thing to do is to make good use of the "hunt" and put it on the table!  When Marie was a little girl, she was shocked that her father would hunt "the bird of God" as she called the doves, so Ben did operate under some controversy around here for awhile!  I think Marie's views have become less "radical" since she was 4 though :)
Anyway, so last weekend, Ben got quite a few really nice birds, and it happened that I had a very interesting recipe from an old cookbook I had found on our trip to Montana.  The cover, as you can see, was in rough shape, but the book itself is signed and is in good condition.  Published in 1970, the title is "Mangiamo (Let's Eat!)".  It was written by Sylvia Sebastiani, the wife of the California vinter, August Sebastiani.  Obviously, it showcases cooking with wine, but it is a collection of Mrs. Sebastiani's recipes, not just a wine advertisement.   So, I tried her recipe titled simply, "Doves", and it is fantastic!  If you've never tried doves, they are dark-meated and have a mild, non-gamey flavor.  Usually, only the breasts are used.  I like to soak them overnight in salty water because this makes them moist and more tender, but it's not necessary.  If you don't have access to doves, or you just don't want to "go there", this recipe would be just as yummy with chicken thighs or duck breasts.   Served with polenta with a crisp green salad, this was a perfect fall dinner!  "Food on the table" indeed!


Mrs. Sebastiani's "Doves"
8-10 dove breasts
2 Tbl. flour
4 Tbl. olive oil
2 Tbl. butter
2 cloves chopped garlic
1.5 cups white wine (Chardonnay is good)
1-2 tsp. fresh thyme leaves
1 tsp. fresh rosemary leaves
2 tsp. fresh chopped parsley
salt and pepper

Sprinkle the dove breasts with salt and pepper liberally.  Dust with flour and brown in oil and butter.  Add the garlic and herbs and cook another minute or so, stirring to incorporate with the doves.  Add the wine, stir around, and simmer, covered until the doves are tender-- about 45 minutes to an hour.  Serve with polenta.
Note:  If the dove breasts are relatively large and you have time, it is nice to bone them out.  It makes them easier to brown and to eat.  However, they taste great either way!

ASB