Sunday, October 28, 2012

Mexican Chicken and Spinach Casserole


Here in San Antonio, Texas, we love our Tex-Mex.  Mostly, we don't concern ourselves with what is "authentic, regional Mexican cuisine" and what is something Mexican Americans (or cowboys) developed later.  We like what we like!
Sometimes though, despite ourselves, we get an education regarding the varied and wonderful dishes that really are native to Mexico.  In the '90s, there was a revival of interest in Frida Kahlo, painter and wife of Mexican artist Diego Rivera.  "Everything Frida" was pretty trendy in those days, so of course, there had to be a cookbook!  Written by her stepdaughter, it had beautiful pictures of the dishes and interesting essays on the artists' lives.  I bought it mostly because the stories were interesting, but it turned out to be one of my favorite cookbooks, and I've made quite a few dishes and did learn a few things about "real" Mexican food-- mostly that it's really tasty!
This casserole has lots of spinach and is fairly light.  I streamlined it a bit from the original recipe, changed some proportions (I think something was lost in the translation from metric to English measurement!), and added the chicken, which I think is very tasty with the spinach sauce and chile.  The chile flavor is subtle, but adds a lot of interest! If you don't have a food processor, you can process the sauce in a blender.  Pour in some of the cream sauce and it will all blend up beautifully!
P.S.  Like the paper flowers?  I'm making them now!  Ole! :)

Mexican Chicken and Spinach Casserole

About 2 cups cooked chicken (leftovers are good, OR shred up part of a rotisserie chicken OR simmer a couple chicken breasts in salted water for about 20 minutes)
12 oz. frozen spinach
1 serrano chile
2 T. butter
2 T. flour
1 cup milk
1/4 cup cream
8 oz. penne pasta or elbow macaroni
1/4 cup Parmesan cheese
Salt and pepper

Spray with PAM or butter a 2 qt. casserole.  Preheat the oven to 350F.
Boil the pasta according to the package directions in salted water.  Drain well, rinse under cold water, and set aside.
Cook the spinach in the microwave for about 3-4 minutes.  It should be hot and completely thawed.
Squeeze out most, but not all of the moisture from the spinach.  It doesn't have to be super dry.
Chop the serrano chile coarsely.  Use the seeds if you like a spicy dish, or remove them for a milder one.
Mix the spinach and chile in a food processor until chopped finely.
Melt the butter in the pot you cooked the pasta in.  Add the flour and cook briefly, stirring.  Add the milk, cream, and salt and pepper to taste.  Cook and stir with a whisk until thickened and smooth.  Stir in the spinach / chile mix.  Taste to see if you need to add more salt and/or pepper.  T
Add the pasta and chicken and mix thoroughly and turn into the baking dish.  Sprinkle with Parmesan cheese.
Bake for 25-30 minutes, until bubbly and browned.


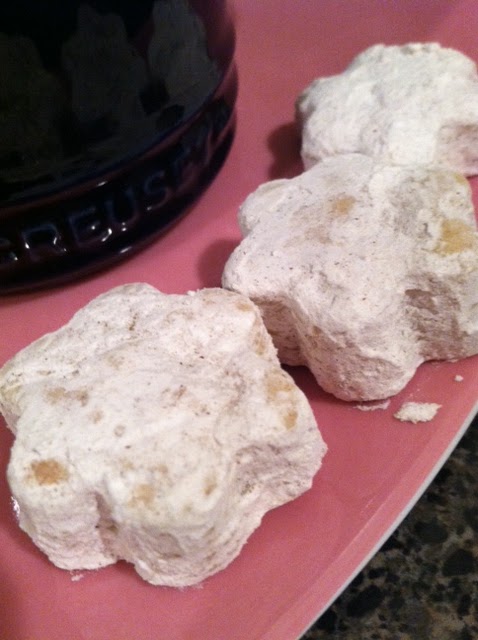
These Mexican shortbread cookies are fun to make!  Another post coming soon! :)

Sunday, October 21, 2012

Memories of Meyer Lemons and More!

Before I talk about Meyer lemons, I wanted to let you all know about another super cute blog, "Little Kitchie" !  It's written by Marie, my daughter.  You might have read her guest blog post here a while back.  Her first post is for the most scrumptious looking black pepper and gruyere popovers!  Here's the link:
http://littlekitchie.blogspot.com/  
Marie and I like to exchange recipes and she thought this would be a fun way to do that and to share with you all as well!  I agree!  
Well, nowdays Meyer lemons are everywhere, but these lemon-orange hybrids used to be mostly a California, regional fruit.  As a child, I lived in southern California and my mom and dad owned and operated a nursery.  We lived on the property, and I have so many fun memories of playing among all the plants with my cousins.  Easy to grow, prolific and fragrant, my parents sold a lot of Meyer lemon trees, and it was really quite awhile before I knew lemons did not generally mean Meyer lemons!  One whiff of that lovely, floral frangrance definitely takes me back to those days in Garden Grove when there were still strawberry fields and orange groves among the growing subdivisions. A few days ago, my friend, Julie, called and she was making Meyer lemon pudding cakes.  Just hearing that name made me a little nostalgic.  Then yesterday at the Farmer's Market, there they were and on sale for a great price!  Since imitation is the most sincere form of flattery (right, Julie? :) ), I decided to make Meyer lemon pudding cakes too!  These luscious little desserts are so fun to make!  They bake up with a tender, moist, spongey cake on top and a creamy, citrus-y flavored pudding on the bottom-- magic!  They are wonderful served warm or cold.  If served warm, they are cozy and comforting.  If served cold, they are refreshing and bright.  It's a win-win!  One warning though:  they "go down easy" and before you know it, you're finished and are thinking you certainly could eat another one!  Ben ate THREE of these in less than a 12-hour period.  Uh-oh, it might be awhile before I can make these again, but I'm sure your family has more will power :)
NOTE:  This recipe can be made with regular lemons also.  If you do, they are every bit as delicious!  Use 1 more tablespoon of sugar than called for in this recipe though.  

Meyer Lemon Pudding Cakes
2 Tbl. butter
1/3 cup sugar
2 eggs, separated
3 Tbl. flour
1.75 cups milk
1/4 cup Meyer lemon juice
1 Tbl. grated Meyer lemon peel

1.  Preheat oven to 350F.  Set a kettle of water on medium heat.  Get out a 13"x9" pan and set 6, 6oz. ramekins in the pan.  You can also make this recipe in an 8x8-inch baking dish.
2.  In a large bowl, beat the butter and sugar together well.  Beat in the egg yolks until blended.
3.  Add the flour and blend well; then add milk and juice.
4.  Beat the egg whites until soft peaks form when you lift the beaters. 
5.  Fold the egg whites into the lemon mixture using a large rubber spatula.  Fold in the lemon peel.  Don't over mix; the mixture will appear mostly smooth with a few small lumps.
6.  Pour the mixture into the ramekins or baking dish.  By now the kettle should have boiling (or very hot) water in it.  Pour water into the 13x9 dish, all around the ramekins to a depth of about 1 inch.
7.  Carefully, put the pan in the oven and bake the ramekins for 25-30 minutes, or the 8x8 dish for 40-45 minutes.  A knife inserted in the center should come out clean when they are done.
8.  Remove carefully from the water and let stand at least 15 minutes before serving.  Or cool and refrigerate to serve cold.
Right before serving, you can sprinkle them with powdered sugar or not-- they taste wonderful either way!
Refrigerate any leftovers-- a yummy midnight snack-- ask Ben :)
ASB

Monday, October 8, 2012

Tastes Better the Next Day: Gumbo!


If you've ever cooked at all, you probably already know there are some things that taste a lot better the next day.  Just about anything that is simmered on the stove for awhile tastes even better when allowed to sit in the fridge overnight.  Stews, chili, soups-- all these really gain depth after a rest in the refrigerator.   Cajun or Creole Gumbo is another one of those dishes and that is really great news for the cook!  Gumbo contains a number of ingredients and there are several steps in the cooking process, but all the preparation can be done the day before your guests arrive (makes a LOT, so it's definitely one of those dishes to be shared!), and the next day, after re-heating it, you have something even more wonderful! 
If you need a dish that feeds a lot of people, doesn't require a lot of "go withs", can be made ahead and tastes great, gumbo is a great choice.  I adapted this recipe from a little card I got  from the Texas Agricultural Extension Service a long time ago.  Ben and I stopped at a park center on the way to Corpus Christi and there were all kinds of free recipe cards for different sea food dishes popular on the Gulf Coast.  I gathered up a few, not thinking they would be that wonderful-- but they were free!  It turns out these Ag Extension home ec ladies really know their stuff and I've made many of the recipes over and over. 
As I said, it takes awhile to put this recipe together, but it is worth every minute and the next day when you're already to feed your hungry group, you'll feel every bit as competent and organized as one of those home ec ladies!  Be sure to wear a cute apron :)

Chicken, Sausage and Shrimp Gumbo (serves 6 as a main dish)
1 lb. cut up cooked chicken meat (I take the meat off one of those roasted chickens.)
1 lb.  sliced smoked sausage
1 lb. shrimp, peeled and deveined (I remove the tails also)
1/3 c. flour
1/3 c. vegetable oil
2 c. chopped onions
2 c. chopped celery
1 c. chopped green pepper
1, 10-12 oz. pkg. frozen sliced okra
1, 8oz. can tomato sauce
1/4 c. chopped flat leaf parsley
1, 13oz can chicken broth
3 bay leaves
2 T Worcestershire sauce
1 T dried thyme
2 t. each garlic salt and pepper
1 t. Tabasco sauce 
Salt to taste
cooked white rice (prepare 2 cups dry rice)

Heat oil in a large cast iron skillet, if available (I use a Dutch oven).  When hot, add the flour and stir constantly with a wire whisk until dark and smooth.  Add vegetables, except okra, and cook until tender.  Add tomato sauce, 2 c. water, and chicken broth.  Add all the seasonings.  Simmer 1 hour. 
Meanwhile, lightly brown sausage slices in a frying pan.  Drain them well.
Add the chicken, sausages, raw shrimp and okra to the Dutch oven.  Simmer for 15 min.  Make sure shrimp are pink and cooked through.
Allow the mixture to cool down off heat, stirring every once in awhile, then refrigerate overnight-- don't cover it until the mixture is completely cold.
Re-heat in the oven (less chance of burning), covered, for 45 minutes at 400F, or until simmering.  Keep warm on top of the stove until serving time.
Serve with a scoop of hot rice.

I also like to serve crusty French bread with it and a fruit type dessert!
ASB